
Banishing dust and grime makes your home more enjoyable, but it can also help keep you and your family safer. Plus, many spring-cleaning tasks can improve your appliances’ efficiency, potentially lowering utility bills and preventing the need for expensive repairs down the road.
As you scrub through your spring cleaning to-do list, make sure to tackle these often overlooked, yet crucial, tasks.
Deep clean high-touch surfaces.
Disinfect light switches, doorknobs, banisters, cupboard pulls, and other high-touch surfaces to help stop infections from spreading. A quick swipe with a microfiber cloth and cleaner removes visible filth, but it doesn’t necessarily destroy germs—for that, you’ll need a disinfectant that says it kills bacteria, viruses, and other microbes.
The easiest way to disinfect most high-touch surfaces is to use a solution of bleach and water, says Deidre Fisher, owner of Simply Bliss, a Utah-based cleaning and organizing service. Make the solution by combining four teaspoons of bleach with a quart of room-temperature water. Leave the mixture on surfaces for one minute before wiping it off. If you purchase a disinfecting spray, follow the directions on the package and let the product sit for the specified time to ensure the disinfectant has enough time to kill any pathogens.
Smart Tip: Be careful with disinfectants—they’re potentially hazardous to kids and pets, and combining them with other cleaners can be dangerous. Always follow the safety instructions on the bottle and ensure you have proper ventilation while cleaning.
Vacuum refrigerator coils.
When covered in layers of dust, condenser coils on older models can struggle to keep your fridge or freezer cool. To clean them, start by unplugging the appliance. Then, either pull it out from the wall or remove the base grill, depending on the coils’ location. Use a refrigerator coil brush to dislodge and clean off the dirt, Fisher says. (You can purchase one for around $10 at a hardware store or online.)
Use a flashlight to help see where you need to clean, recommends Frank Berger, CEO and founder of You've Got Maids. With a vacuum’s small attachment, gently vacuum around the coils and pick up any dirt, dust, pet hair, and so on that the coil brush dislodged, Berger says.
Once the coils—and the floor below—are clean, return the fridge or freezer to its original position and plug it back in.
Smart Tip: If your refrigerator supplies drinking water and ice, check the manual to find out the recommended replacement frequency for the filter. For both Whirlpool and Frigidaire appliances, the general recommendation is every six months.
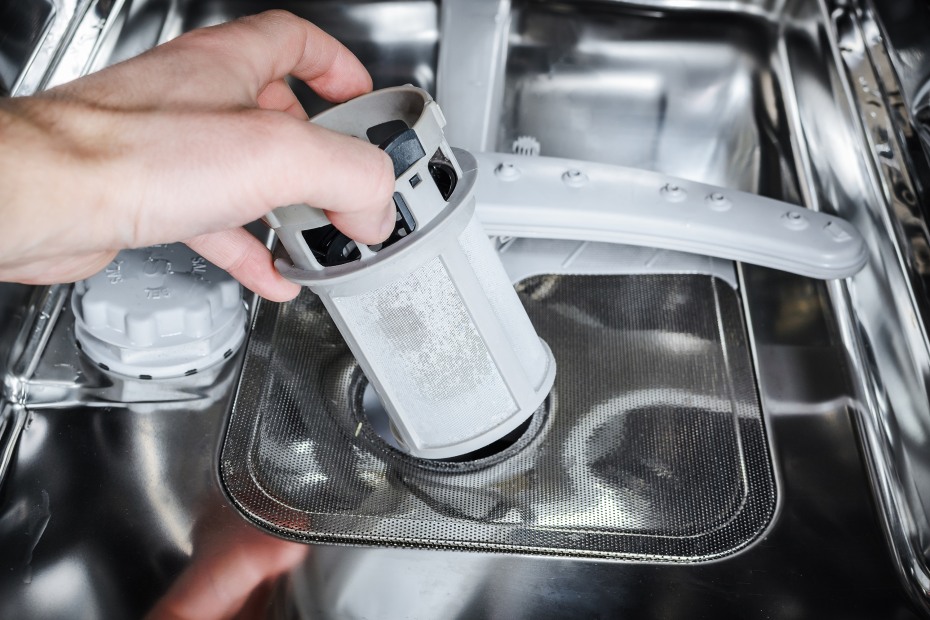
A clear dishwasher filter ensures the water drains properly.
Clean the dishwasher.
A dishwasher is a kitchen MVP, but the moisture and warm temperature inside also make it an ideal breeding ground for fungi and black yeast, says Lauren Bowen, director of franchise operations at Two Maids & A Mop. Yuck!
To keep your dishwasher free of odors, stains, and fungus, Bowen recommends following a two-part process once a month: First, place a cup of white vinegar on the upper rack and run an empty hot-water cycle. Once that cycle is complete, sprinkle a cup of baking soda on the bottom of the dishwasher and run another empty hot cycle.
Smart Tip: Clean the dishwasher’s filter regularly to improve cleaning and remove food particles. Check your manual for instructions.
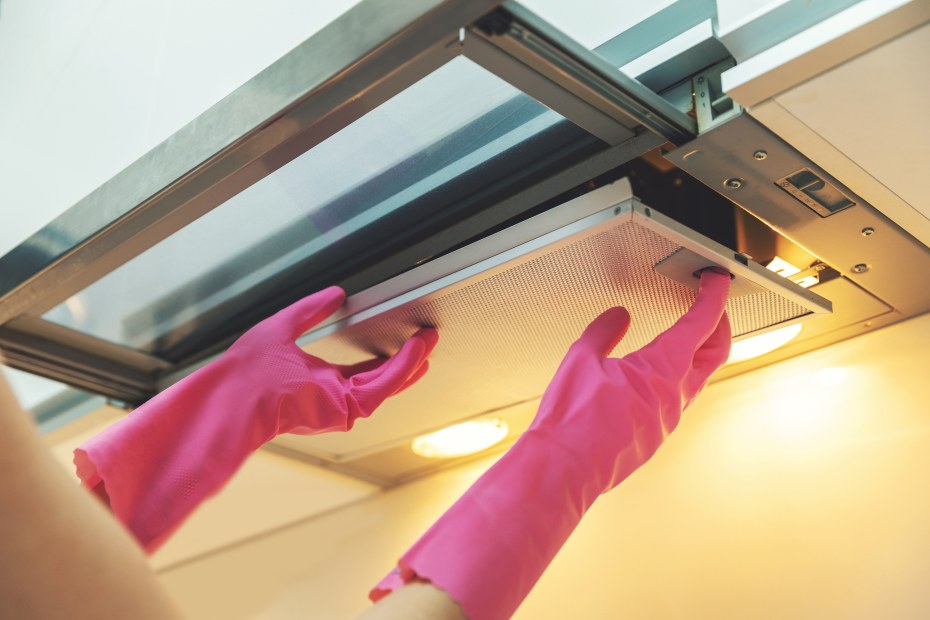
Prevent grease buildup on the range hood.
Degrease the range hood.
Cooking can add a layer of grease and grime to your range hood and filter, which can decrease its efficiency and cause harmful byproducts from cooking to linger in your home. That layer of grease can also catch on fire.
To clean the filter, submerge it in a sink of hot water with anti-grease dish soap and a 1/4 cup of baking soda for 15 minutes, Berger says. While the filters are soaking, clean the hood with a degreaser spray (Fisher recommends Simple Green) and hot water. “Use a stainless [polish] to obtain a sparkle when you are done,” Fisher says.
Finally, gently scrub both sides of the filter with a utility brush and rinse. Once it’s dry, place it back on.
Clean (and test!) smoke alarms and carbon monoxide detectors.
Life-saving smoke alarms and carbon monoxide detectors need to be cleaned regularly to work properly—dust, dirt, insects, and spiderwebs can cause the alarm to go off when no danger is present. First, remove the devices, then wipe them down with a soft, dry cloth or vacuum them with a soft brush attachment. If you still see debris in the sensing chamber, blow it out with compressed air. Follow the manufacturer’s instructions on maintenance, but aim to clean them at least a couple of times a year.
When you’re done, test your smoke alarms and carbon monoxide detectors, and create a recurring monthly calendar event or reminder to test all of the devices in your home.
Remove lint from the dryer.
Lint buildup can spark a fire, says Mark Dawson, COO of One Hour Heating & Air Conditioning. Washing machines and dryers account for 4 percent of home fires, per the National Fire Protection Association.
Remove lint from the lint filter after every load. If you have stubborn buildup, wash the lint filter screen with a nylon brush, soap, and hot water. You should also occasionally vacuum or wipe down the back of the dryer to remove any accumulated lint and dust.
Finally, clean the vent hose or duct annually, or when you notice your clothes are taking longer to dry. Unplug the dryer, pull it away from the wall, detach the vent, and vacuum inside. If you have a power drill, you can buy a dryer duct cleaning kit that attaches to the drill and speeds up the process considerably. Be careful not to pinch or bend the hose when sliding the dryer back into place.
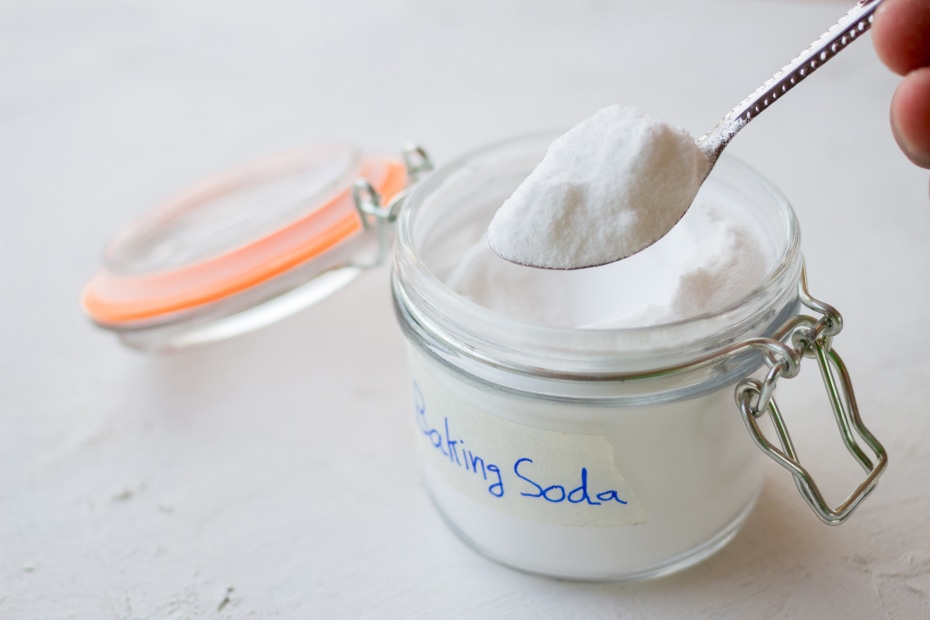
Baking soda is great for scouring hard surfaces, but it can also keep your drains flowing.
Maintain your drains.
Prevent clogged drains and garbage disposal mishaps with routine maintenance. Once a week, run hot water down the drain to clear out grease and gunk, recommends Doyle James, president of Mr. Rooter Plumbing. When you notice your pipes are beginning to drain more slowly, pour half a cup of baking soda and equal parts vinegar into the drain. After 30 minutes, wash it down with hot water.
Remove mold and mildew.
You’ll need a pro to tackle large areas of mold, but smaller areas—under 10-square feet—can be remedied by homeowners. Remove mold and mildew with a cleaning detergent and hot water. Berger from You've Got Maids recommends using Ecolab Gel Pro Cleaner to vanquish mold. After scouring, ensure the area dries completely to prevent regrowth.
Smart Tip: When it comes to relentless fungi, the best strategy is prevention—squeegee your shower after use and make sure your bathroom (and other moist areas) have good ventilation.
Clean the furnace.
Your furnace and its surrounding area should be cleaned yearly, says Marla Mock, VP of operations at Aire Serv—this will help your system operate efficiently and prevent dust from turning into a fire hazard. You can tackle this project yourself, or call in a professional for help. With older furnaces, be prepared to re-light the pilot light once the clean-up is complete.
Your first steps are to turn off the furnace at the breaker box, then turn the furnace’s power switch and gas valve to the off position, Mock says. Next, use a damp rag to wipe down the exterior. Then lift the furnace access door and vacuum the base and burners using the wand attachment. Finally, blow dust off the pilot light using a drinking straw and clean the flame sensor with an emery cloth (available at hardware stores and online), she says.
When you’ve completed these steps, turn the furnace back on, and, if necessary, re-light the pilot light.
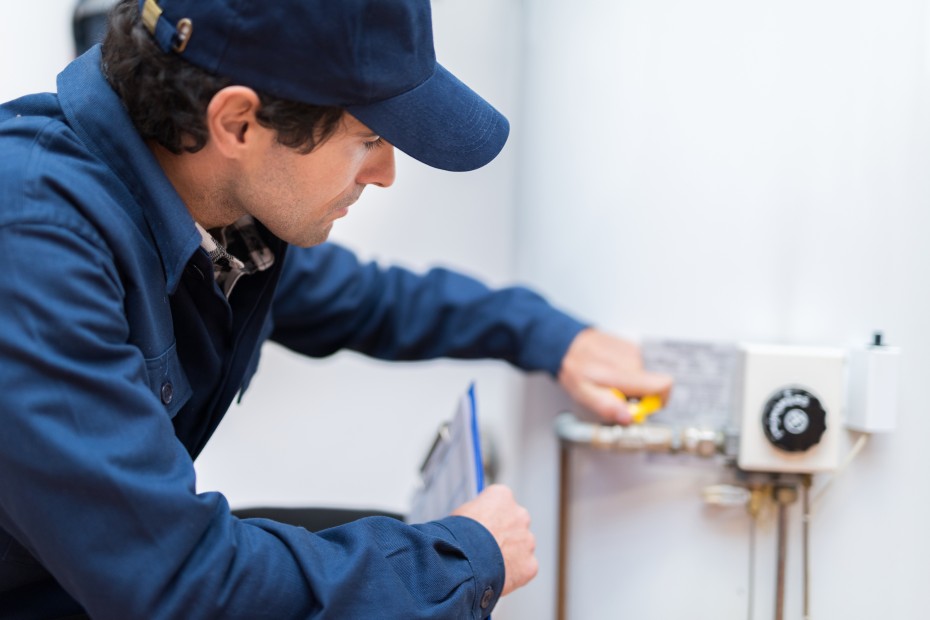
Hot water heaters should be flushed yearly to remove buildup.
Flush the water heater.
You should clean and flush gas water heaters annually, Mock says—or opt to do it twice a year if you have hard water, which causes damaging mineral buildup.
Turn off the water supply and gas, then turn the knob on the heater to “pilot,” instructs Mock. Turn on a faucet (like the one for your tub or shower) to full hot to allow air to flow into the water heater as it drains. With heavy-duty gloves, attach a hose to the drain valve and put the other end outside or in a bucket. Open the drain valve and let water flow. Once water stops dripping from the end of the hose, reopen the water valve on the hot water heater and let the water run until it’s clear to flush sediment from the tank. Finally, detach the hose, close the valve, and turn the gas back on.
Remove ash and buildup from the fireplace.
Getting rid of ash can be messy. Berger recommends using a tarp to cover the space in front of the fireplace to make cleanup easier and prevent stains. Remove any wood or large debris before sweeping or vacuuming out the remaining ash with a shop vac (a regular vacuum could be ruined by ash). Empty the vacuum bag (or dustpan) outside, being careful not to breathe any of the debris in.
Schedule a chimney inspection annually, and have it professionally cleaned as needed. Doing so removes cresotate and toxins, which reduces fire risk, says Dallas Nevill, owner of Rainbow International Restoration of Southwest Mesa.